

24.01.2015
In this guide, I will show how to install NVIDIA driver kernel Module CUDA, replace stock Pyrit, and install Cpyrit. The main problem with new Kali Linux 1.0.7 running Kernel 3.14 was that it broke Pyrit and cudaHashcat. When you try to run pyrit command, you get this error ERROR: could not insert ‘nvidia_uvm’: Invalid argument. I will show how to install all the necessary drivers, modules and also fix this error. At the end of this guide, you will be able to use GPU acceleration for enabled applications such as cudaHashcat, Pyrit, crunch etc.
This guide replaces the old guides
- How to Install NVIDIA Kernel Module CUDA and Pyrit in Kali Linux
- Install proprietary NVIDIA driver on Kali Linux – NVIDIA Accelerated Linux Graphics Driver
This is part 2 of installing NVIDIA driver kernel Module CUDA and Pyrit on Kali Linux Driver series which was divided into two parts:
- Kali Linux 1.0.7 kernel 3.14 – Install proprietary NVIDIA driver – NVIDIA Accelerated Linux Graphics Driver
- Kali Linux 1.0.7 kernel 3.14 install NVIDIA driver kernel Module CUDA and Pyrit – CUDA, Pyrit and Cpyrit-cuda
You use the first guide to install NVIDIA Driver on Kali Linux. I would assume you followed the first guide and completed all steps there and would like to enable GPU acceleration, (cudahashcat, GPU pass through etc.) on your Kali Linux.
Contents
- CUDA Toolkit
- Prerequisites
- Step 1: Install NVIDIA CUDA toolkit and openCL
- Step 2: Download Pyrit and Cpyrit
- Step 3: Install Pyrit
- Step 4: Install CPyrit-cuda
- Step 5: Fixing ERROR: could not insert ‘nvidia_uvm’: Invalid argument
- Step 6 – Test Pyrit – It works!
- Step 7 – Install oclHashcat (cudaHashcat)
- Step 8 – Missing cudahashcat in Kali 1.0.9 problem and fix
- Bug report for missing cudahashcat in Kali 1.0.9
- Conclusion
CUDA Toolkit
The NVIDIA® CUDA® Toolkit provides a comprehensive development environment for C and C++ developers building GPU-accelerated applications. The CUDA Toolkit includes a compiler for NVIDIA GPUs, math libraries, and tools for debugging and optimizing the performance of your applications. You’ll also find programming guides, user manuals, API reference, and other documentation to help you get started quickly accelerating your application with GPUs. You can read a lot more here in NVIDIA Developers official webpage:
Prerequisites
Following are the prerequisite before you start following this guide:
NOTE: This guide does not apply to VMWare, VirtualBox users. GPU Acceleration doesn’t work on Virtual environment.
Prerequisite 1: add Official Kali Linux repository.
I’ve added the correct Kali Official repositories and issued the following commands to update, upgrade and dist-upgrade my Kali Linux.
apt-get update && apt-get upgrade -y && apt-get dist-upgrade -y
Prerequisite 2: Install proprietary NVIDIA driver on Kali Linux
I’ve installed the correct official proprietary NVIDIA driver on Kali Linux – NVIDIA Accelerated Linux Graphics Driver using the previous guide:
If you’ve completed both, move to next instruction.
Step 1: Install NVIDIA CUDA toolkit and openCL
At first we need to install NVIDIA CUDA toolkit and NVIDIA openCL
aptitude install nvidia-cuda-toolkit nvidia-opencl-icd

This will install CUDA packages in your Kali Linux. The total package is pretty large including dependencies, (282MB something), you be patient and let it finish.
Step 2: Download Pyrit and Cpyrit
Download Pyrit and Cpyrit from the official website:
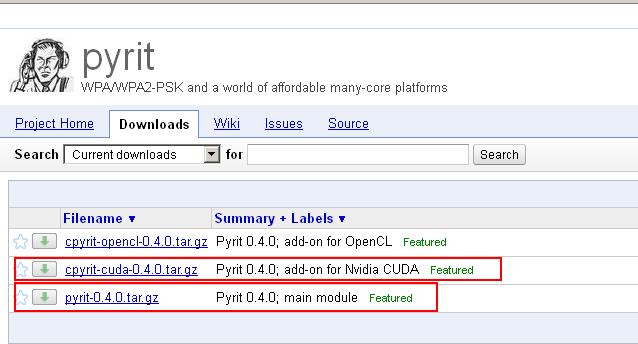
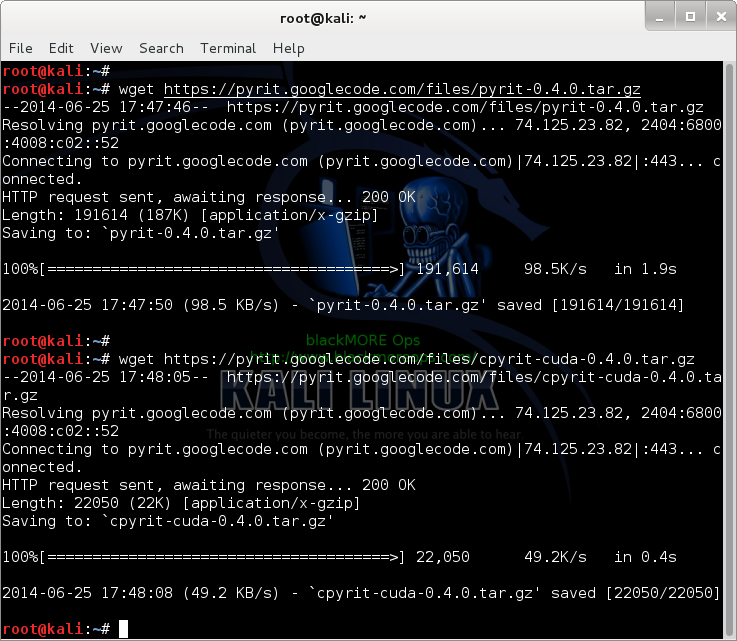
Save them in your /root folder. Alternatively you can just run the wget commands I’ve used below:
wget https://pyrit.googlecode.com/files/pyrit-0.4.0.tar.gz wget https://pyrit.googlecode.com/files/cpyrit-cuda-0.4.0.tar.gz
Step 3: Install Pyrit
Follow the instructions below to install Pyrit and it’s prerequisites.
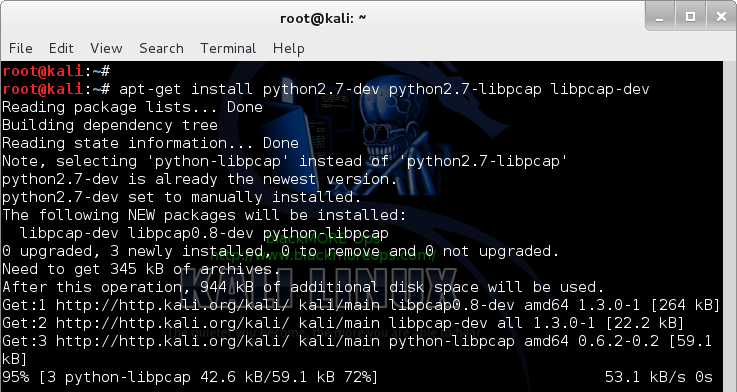
Step 3.a: Install Pyrit prerequisites
apt-get install python2.7-dev python2.7-libpcap libpcap-dev
Step 3.b: Remove existing installation of Pyrit
Remove stock Pyrit using the following command:
apt-get remove pyrit

We used to get a message stating that it will also remove kali-linux-full package. Seems on Kali Linux 1.0.7 it’s fixed.
If you are not using a clean install of Kali (not recommended), you may need to issue the following command:
rm -r /usr/local/lib/python2.7/dist-packages/cpyrit/
Step 3.c: Install new Pyrit
Copy paste the following commands to extract downloaded Pyrit in your Kali Linux /root directory
tar -xzf pyrit-0.4.0.tar.gz cd pyrit-0.4.0
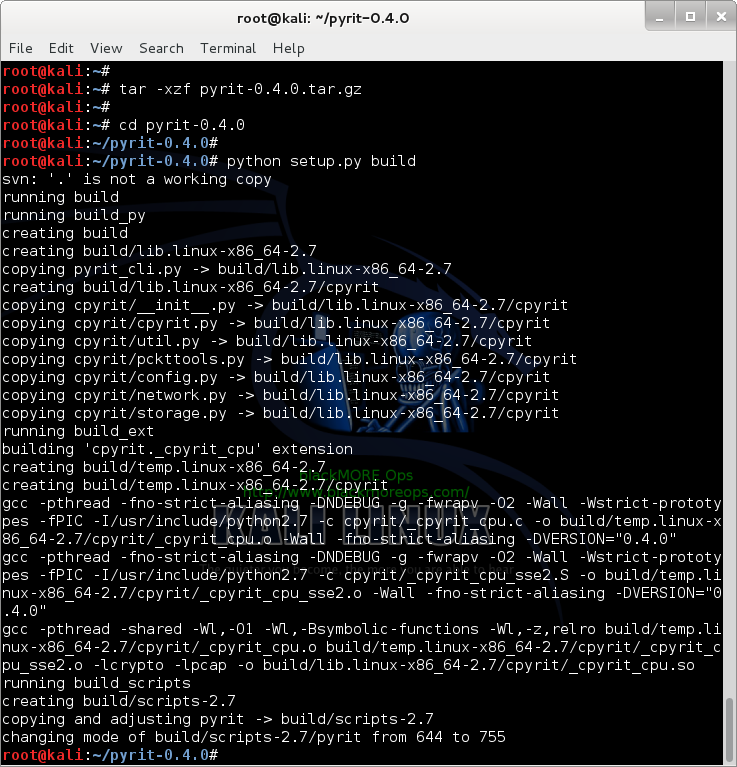
Now build the package
python setup.py build
Once build is complete, you can install Pyrit.
python setup.py install
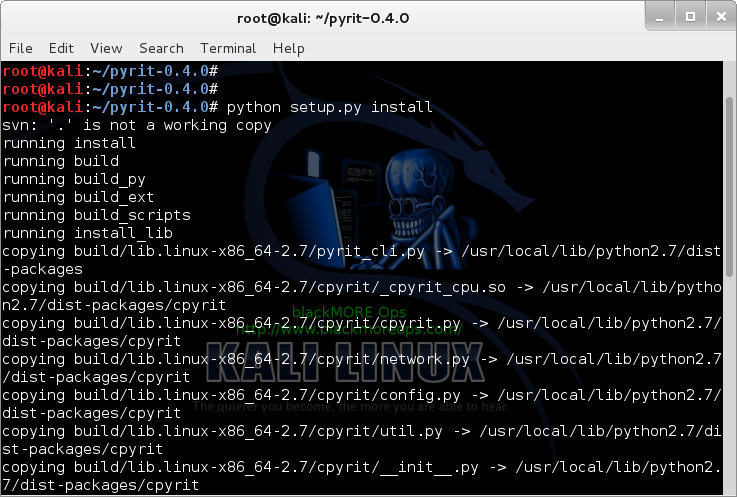
Up to this point, you shouldn’t receive any errors.
Step 4: Install CPyrit-cuda
Copy paste the following commands to extract downloaded CPyrit-cuda in your Kali Linux /root directory
tar -xzf cpyrit-cuda-0.4.0.tar.gz cd cpyrit-cuda-0.4.0

Now build the package
python setup.py build
Once build is complete, you can install CPyrit-cuda.
python setup.py install
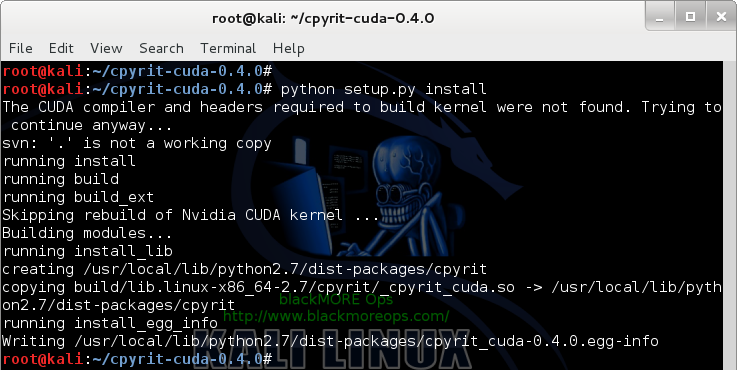
Again, you shouldn’t receive any errors, if there’s error, go back and review each steps.
Step 5: Fixing ERROR: could not insert ‘nvidia_uvm’: Invalid argument
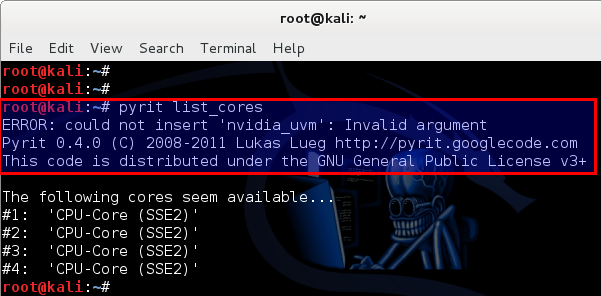
Now that we’ve installed NVIDIA driver kernel Module CUDA and Pyrit on Kali Linux, we should be able to test it. The best way to test is by issuing the following command:
pyrit list_cores
This gave me an error ERROR: could not insert ‘nvidia_uvm’: Invalid argument
root@kali:~# pyrit list_cores ERROR: could not insert ‘nvidia_uvm’: Invalid argument Pyrit 0.4.0 (C) 2008-2011 Lukas Lueg http://pyrit.googlecode.com This code is distributed under the GNU General Public License v3+ The following cores seem available… #1: ‘CPU-Core (SSE2)’ #2: ‘CPU-Core (SSE2)’ #3: ‘CPU-Core (SSE2)’ #4: ‘CPU-Core (SSE2)’
Thankfully, reader Shinri provided us with a fix. A BIG thanks to Shinri who spent time and effort to find the fix and was kind enough to post it back on my website.
Thanks Shinri.
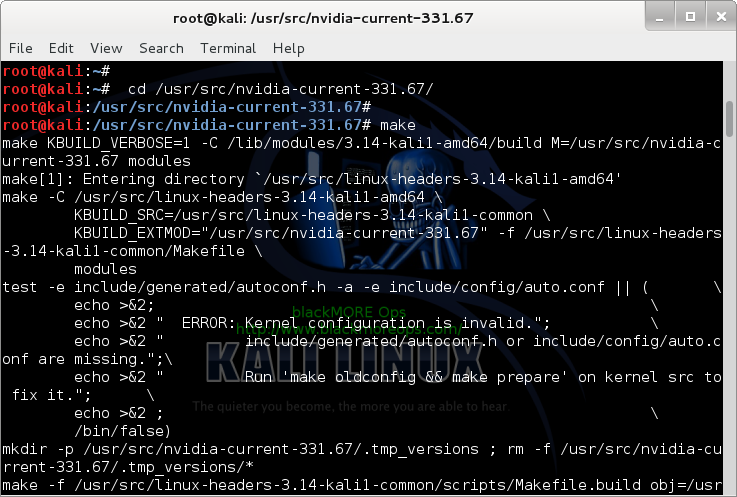
Step 5.a Recompile NVIDIA Driver
First of all you need to recompile NVIDIA driver. Just follow the steps below:
cd /usr/src/nvidia-current-331.67 make
What you’re doing here is going to source directory for NVIDIA current driver and recompiling it. By recompiling, you ensure it’s aligned for your hardware.
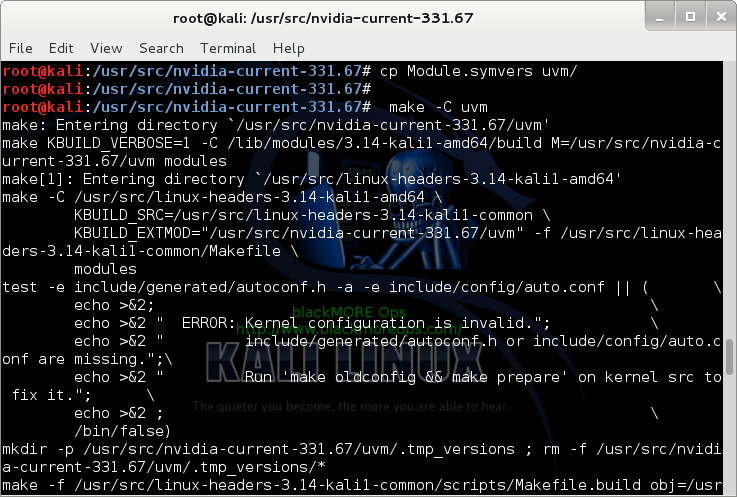
Step 5.b: Copy Module.symvers to UVM and recompile UVM
Now copy the compiled Module.symvers file to UVM folder and recompile UVM.
cp Module.symvers uvm/ make -C uvm
Step 5.c: Copy nvidia-uvm.ko to correct DKMS folder
We’re now very close. Just copy the compiled nvidia-uvm.ko to correct DKMS folder.Use the following command:
cp uvm/nvidia-uvm.ko /lib/modules/`uname -r`/updates/dkms

Those who are interested can read through this really long Debian bug report and envy the hard work done to find this solution.
Debian Bug report logs – #746643
https://bugs.debian.org/cgi-bin/bugreport.cgi?bug=746643
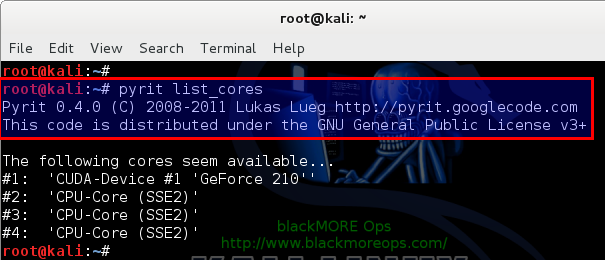
Step 6 – Test Pyrit – It works!
Once you’ve followed Shinri’s solution, recompiled NVIDIA driver, UVM and copied it to correct DKMS folder, pyrit will just work.
root@kali:~# pyrit list_cores Pyrit 0.4.0 (C) 2008-2011 Lukas Lueg http://pyrit.googlecode.com This code is distributed under the GNU General Public License v3+
The following cores seem available… #1: ‘CUDA-Device #1 ‘GeForce 210’’ #2: ‘CPU-Core (SSE2)’ #3: ‘CPU-Core (SSE2)’ #4: ‘CPU-Core (SSE2)’
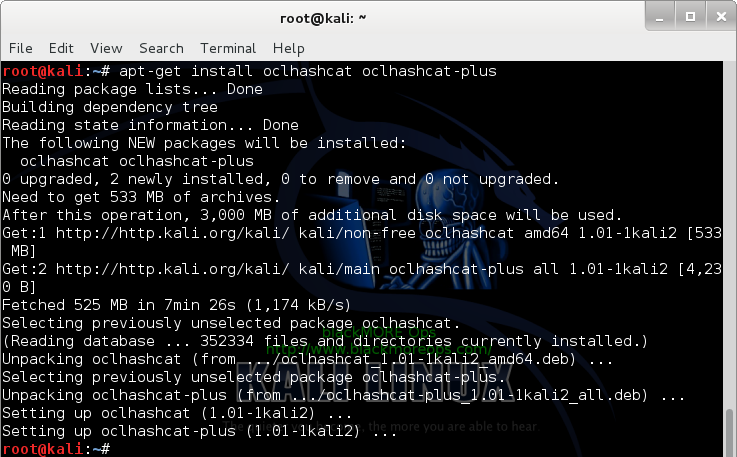
Step 7 – Install oclHashcat (cudaHashcat)
The reason you’ve done all the hard work so that you can use cudaHashcat. I found that Kali 1.0.7 Kernel 3.14 doesn’t install that by default (maybe that was the case in every version). Doesn’t matter, we can just install it quickly.
Use the following command to install OCLhashcat (which contains cudaHashcat too)
apt-get install oclhashcat oclhashcat-plus
Step 8 – Missing cudahashcat in Kali 1.0.9 problem and fix
staticn0de provided a .deb file that you can install manually which installs cudahashcat for you. Link to Original Post below:
I’ve only copy-pasted his instructions below, all credit goes to staticn0de, thank you.
root@kali:# dpkg -i cudaHashcat-1.30.deb
Selecting previously unselected package cudahashcat-1.30.
(Reading database … 349321 files and directories currently installed.)
Unpacking cudahashcat-1.30 (from cudaHashcat-1.30.deb) …
Setting up cudahashcat-1.30 (1.30) …# optirun cudahashcat64 -t 32 -a 7 example0.hash ?a?a?a?a example.dict
cudaHashcat v1.30 starting…
root@kali:
I have taken the archive from the hashcat site and modified it under section 6 of their EULA. The deb installs the program is /usr/share/cudahashcat and places scripts in /usr/bin which calls hashcat like any other command.
I’ll upload it tonight for anyone that wants to use it. Provided as is with no expectation it will work and it may cause damages including death and your wife leaving you (tic) but you get the idea.
Weighs in at 172mb
Download link:
Here’s the new download link:
https://mega.co.nz/#!kFMC2RQC!D1ccQYAwsWyGKD0CaV4W7n5Ghtc-YKFFxs7Qj1pgcw0 md5sum = b753c393264b3c40e51f057a96f3f6e9 sha1sum = f4abc533f4ced0f7e9a82255ceecf0333c212fa2 The file is 475MB

staticn0deJanuary 5, 2015 at 5:03 pm
Hey guys,
I had no idea blackmoreops had used my deb! must say, I’m pretty chuffed! I’ve always been a fan of his guides.
I’ve made a new deb based on the 1.31 cudahashcat. You can find it below in my thread on the kali forums. The guide was written for users with optimus laptops. Those of you who don’t have optimus, omit the ‘optirun’ prefix of the command to test it.
Thanks again staticn0de.
https://www.mirrorcreator.com/files/WURGDJKL/cudaHashcat-1.30.deb_links
SHA1SUM f2c0d96c75d1c186b48e11c5b399f3e2ccc5e459
when installed, its called with ‘cudahashcat64‘ for 64bit or ‘cudahashcat32‘ for 32 bit.
This was the most annoying download link … the amount of spams and popups and redirection was appalling.
Note that this is custom package, built by someone else than Kali Dev team and you should use it at your own risk.
Then again, with recent openSSL and Bash blunder, yeah.. use EVERYTHING in Linux at your own risk.
Once all done, run a cudahashcat benchmark

Bug report for missing cudahashcat in Kali 1.0.9
In the meantime, I’ve taken the liberty of reporting this missing cudahashcat as a Bug report.
https://bugs.kali.org/view.php?id=1756
Hopefully, it will be fixed in next release (i.e. Kali v1.0.10).
Conclusion
Pyrit allows to create massive databases, pre-computing part of the IEEE 802.11 WPA/WPA2-PSK authentication phase in a space-time-tradeoff. Exploiting the computational power of Many-Core- and other platforms through ATI-Stream, Nvidia CUDA and OpenCL, it is currently by far the most powerful attack against one of the world’s most used security-protocols.
If you’re reading this post and this helped, PLEASE put a comment “Thanks Shinri” in the comment section. That’s the least we can do.I guess a big thanks goes to staticn0de as well, feel free to post “Thanks staticn0de” if everything works for you.
Comment’s doesn’t require any signin/registration … so help yourself.
Thanks for reading. If this guide helped you to install NVIDIA driver kernel Module CUDA and Pyrit on Kali Linux 1.0.7 kernel 3.14 – CUDA, Pyrit and Cpyrit-cuda, please share this article and follow me in Facebook/Twitter.
cudaHashcat, advanced password recovery
Usage: cudaHashcat [options]… hash|hashfile|hccapfile [dictionary|mask|directory]…
======= Options =======
* General:
-m, –hash-type=NUM Hash-type, see references below -a, –attack-mode=NUM Attack-mode, see references below -V, –version Print version -h, –help Print help –eula Print EULA –quiet Suppress output
* Benchmark:
-b, –benchmark Run benchmark –benchmark-mode=NUM Benchmark-mode, see references below
* Misc:
--hex-charset Assume charset is given in hex –hex-salt Assume salt is given in hex –hex-wordlist Assume words in wordlist is given in hex –force Ignore warnings –status Enable automatic update of the status-screen –status-timer=NUM Seconds between status-screen update –status-automat Display the status view in a machine readable format –loopback Add new plains to induct directory –weak-hash-threshold=NUM Threshold when to stop checking for weak hashes, default is 100 salts
* Markov:
--markov-hcstat=FILE Specify hcstat file to use, default is hashcat.hcstat –markov-disable Disables markov-chains, emulates classic brute-force –markov-classic Enables classic markov-chains, no per-position enhancement -t, –markov-threshold=NUM Threshold when to stop accepting new markov-chains
* Session:
--runtime=NUM Abort session after NUM seconds of runtime –session=STR Define specific session name –restore Restore session from –session –restore-disable Do not write restore file
* Files:
-o, –outfile=FILE Define outfile for recovered hash –outfile-format=NUM Define outfile-format for recovered hash, see references below –outfile-autohex-disable Disable the use of $HEX[] in output plains –outfile-check-timer Seconds between outfile checks -p, –separator=CHAR Separator char for hashlists and outfile –show Show cracked passwords only –left Show un-cracked passwords only –username Enable ignoring of usernames in hashfile (recommended: also use –show) –remove Enable remove of hash once it is cracked –remove-timer=NUM Update input hash file each NUM seconds –potfile-disable Do not write potfile –debug-mode=NUM Defines the debug mode (hybrid only by using rules), see references below –debug-file=FILE Output file for debugging rules (see also –debug-mode) –induction-dir=FOLDER Specify induction directory to use, default is $session.induct –outfile-check-dir=FOLDER Specify the outfile directory which should be monitored, default is $session.outfiles –logfile-disable Disable the logfile
* Resources:
-c, –segment-size=NUM Size in MB to cache from the wordfile –bitmap-max=NUM Maximum number of bits allowed for bitmaps –cpu-affinity=STR Locks to CPU devices, seperate with comma –gpu-async Use non-blocking async calls (NV only) -d, –gpu-devices=STR Devices to use, separate with comma -w, –workload-profile=NUM Enable a specific workload profile, see references below -n, –gpu-accel=NUM Workload tuning: 1, 8, 40, 80, 160 -u, –gpu-loops=NUM Workload fine-tuning: 8 - 1024 –gpu-temp-disable Disable temperature and fanspeed readings and triggers –gpu-temp-abort=NUM Abort session if GPU temperature reaches NUM degrees celsius –gpu-temp-retain=NUM Try to retain GPU temperature at NUM degrees celsius (AMD only) –powertune-enable Enable automatic power tuning option (AMD OverDrive 6 only) –scrypt-tmto Manually override automatically calculated TMTO value for scrypt
* Distributed:
-s, –skip=NUM Skip number of words -l, –limit=NUM Limit number of words –keyspace Show keyspace base:mod values and quit
* Rules:
-j, –rule-left=RULE Single rule applied to each word from left dict -k, –rule-right=RULE Single rule applied to each word from right dict -r, –rules-file=FILE Rules-file, multi use: -r 1.rule -r 2.rule -g, –generate-rules=NUM Generate NUM random rules –generate-rules-func-min=NUM Force NUM functions per random rule min –generate-rules-func-max=NUM Force NUM functions per random rule max –generate-rules-seed=NUM Force RNG seed to NUM
* Custom charsets:
-1, –custom-charset1=CS User-defined charsets -2, –custom-charset2=CS Example: -3, –custom-charset3=CS –custom-charset1=?dabcdef : sets charset ?1 to 0123456789abcdef -4, –custom-charset4=CS -2 mycharset.hcchr : sets charset ?2 to chars contained in file
* Increment:
-i, –increment Enable increment mode –increment-min=NUM Start incrementing at NUM –increment-max=NUM Stop incrementing at NUM
========== References ==========
* Workload Profile:
1 = Reduced performance profile (low latency desktop) 2 = Default performance profile 3 = Tuned performance profile (high latency desktop)
* Benchmark Settings:
0 = Manual Tuning 1 = Performance Tuning, default
* Outfile Formats:
1 = hash[:salt] 2 = plain 3 = hash[:salt]:plain 4 = hex_plain 5 = hash[:salt]:hex_plain 6 = plain:hex_plain 7 = hash[:salt]:plain:hex_plain 8 = crackpos 9 = hash[:salt]:crackpos 10 = plain:crackpos 11 = hash[:salt]:plain:crackpos 12 = hex_plain:crackpos 13 = hash[:salt]:hex_plain:crackpos 14 = plain:hex_plain:crackpos 15 = hash[:salt]:plain:hex_plain:crackpos
* Debug mode output formats (for hybrid mode only, by using rules):
1 = save finding rule 2 = save original word 3 = save original word and finding rule 4 = save original word, finding rule and modified plain
* Built-in charsets:
?l = abcdefghijklmnopqrstuvwxyz ?u = ABCDEFGHIJKLMNOPQRSTUVWXYZ ?d = 0123456789 ?s = !"#$%&’()*+,-./:;<=>?@[]^_`{|}~ ?a = ?l?u?d?s ?b = 0x00 - 0xff
* Attack modes:
0 = Straight 1 = Combination 3 = Brute-force 6 = Hybrid dict + mask 7 = Hybrid mask + dict
* Generic hash types:
0 = MD5 10 = md5($pass.$salt) 20 = md5($salt.$pass) 30 = md5(unicode($pass).$salt) 40 = md5($salt.unicode($pass)) 50 = HMAC-MD5 (key = $pass) 60 = HMAC-MD5 (key = $salt) 100 = SHA1 110 = sha1($pass.$salt) 120 = sha1($salt.$pass) 130 = sha1(unicode($pass).$salt) 140 = sha1($salt.unicode($pass)) 150 = HMAC-SHA1 (key = $pass) 160 = HMAC-SHA1 (key = $salt) 190 = sha1(LinkedIn) 200 = MySQL323 300 = MySQL4.1/MySQL5 400 = phpass, MD5(Wordpress), MD5(phpBB3), MD5(Joomla) 500 = md5crypt, MD5(Unix), FreeBSD MD5, Cisco-IOS MD5 501 = Juniper IVE 900 = MD4 1000 = NTLM 1100 = Domain Cached Credentials, mscash 1400 = SHA256 1720 = sha512($salt.$pass) 1730 = sha512(unicode($pass).$salt) 1740 = sha512($salt.unicode($pass)) 1750 = HMAC-SHA512 (key = $pass) 1760 = HMAC-SHA512 (key = $salt) 1800 = sha512crypt, SHA512(Unix) 2100 = Domain Cached Credentials2, mscash2 2400 = Cisco-PIX MD5 2410 = Cisco-ASA MD5 2500 = WPA/WPA2 2600 = Double MD5 3000 = LM 3100 = Oracle 7-10g, DES(Oracle) 3200 = bcrypt, Blowfish(OpenBSD) 3710 = md5($salt.md5($pass)) 3810 = md5($pass.$salt.$pass) 4300 = md5(strtoupper(md5($pass))) 4400 = md5(sha1($pass)) 4500 = Double SHA1 4700 = sha1(md5($pass)) 4710 = sha1($salt.$pass.$salt) 4800 = MD5(Chap), iSCSI CHAP authentication 5000 = SHA-3(Keccak) 5100 = Half MD5 5200 = Password Safe v3 5300 = IKE-PSK MD5 5400 = IKE-PSK SHA1 5500 = NetNTLMv1-VANILLA / NetNTLMv1+ESS 5600 = NetNTLMv2 5700 = Cisco-IOS SHA256 5800 = Android PIN 6000 = RipeMD160 6100 = Whirlpool 62XY = TrueCrypt 5.0+ (see below) 6300 = AIX {smd5} 6400 = AIX {ssha256} 6500 = AIX {ssha512} 6600 = 1Password, agilekeychain 6700 = AIX {ssha1} 6800 = Lastpass 6900 = GOST R 34.11-94 7100 = OSX v10.8 / v10.9 7200 = GRUB 2 7300 = IPMI2 RAKP HMAC-SHA1 7400 = sha256crypt, SHA256(Unix) 7500 = Kerberos 5 AS-REQ Pre-Auth etype 23 7700 = SAP CODVN B (BCODE) 7800 = SAP CODVN F/G (PASSCODE) 7900 = Drupal7 8000 = Sybase ASE 8100 = Citrix Netscaler 8200 = 1Password, cloudkeychain 8300 = DNSSEC (NSEC3) 8400 = WBB3, Woltlab Burning Board 3 8500 = RACF 8600 = Lotus Notes/Domino 5 8700 = Lotus Notes/Domino 6 8800 = Android FDE <= 4.3 8900 = scrypt 9000 = Password Safe v2 9100 = Lotus Notes/Domino 8 9200 = Cisco $8$ 9300 = Cisco $9$ 9400 = Office 2007 9500 = Office 2010 9600 = Office 2013 9700 = MS Office <= 2003 MD5 + RC4, oldoffice$0, oldoffice$1 9710 = MS Office <= 2003 MD5 + RC4, collider-mode #1 9720 = MS Office <= 2003 MD5 + RC4, collider-mode #2 9800 = MS Office <= 2003 SHA1 + RC4, oldoffice$3, oldoffice$4 9810 = MS Office <= 2003 SHA1 + RC4, collider-mode #1 9820 = MS Office <= 2003 SHA1 + RC4, collider-mode #2 9900 = Radmin2 10000 = Django (PBKDF2-SHA256) 10100 = SipHash 10200 = Cram MD5 10300 = SAP CODVN H (PWDSALTEDHASH) iSSHA-1 10800 = SHA384
* Specific hash types:
11 = Joomla < 2.5.18 12 = PostgreSQL 21 = osCommerce, xt:Commerce 22 = Juniper Netscreen/SSG (ScreenOS) 23 = Skype 101 = nsldap, SHA-1(Base64), Netscape LDAP SHA 111 = nsldaps, SSHA-1(Base64), Netscape LDAP SSHA 112 = Oracle 11g/12c 121 = SMF > v1.1 122 = OSX v10.4, v10.5, v10.6 124 = Django (SHA-1) 131 = MSSQL(2000) 132 = MSSQL(2005) 133 = PeopleSoft 141 = EPiServer 6.x < v4 1421 = hMailServer 1441 = EPiServer 6.x > v4 1711 = SSHA-512(Base64), LDAP {SSHA512} 1722 = OSX v10.7 1731 = MSSQL(2012), MSSQL(2014) 2611 = vBulletin < v3.8.5 2612 = PHPS 2711 = vBulletin > v3.8.5 2811 = IPB2+, MyBB1.2+ 3711 = Mediawiki B type 62XY = TrueCrypt 5.0+ X = 1 = PBKDF2-HMAC-RipeMD160 X = 2 = PBKDF2-HMAC-SHA512 X = 3 = PBKDF2-HMAC-Whirlpool X = 4 = PBKDF2-HMAC-RipeMD160 + boot-mode X = 5 = PBKDF2-HMAC-RipeMD160 + hidden-volume X = 6 = PBKDF2-HMAC-SHA512 + hidden-volume X = 7 = PBKDF2-HMAC-Whirlpool + hidden-volume X = 8 = PBKDF2-HMAC-RipeMD160 + hidden-volume + boot-mode Y = 1 = XTS AES Y = 2 = XTS Serpent — unfinished Y = 3 = XTS Twofish — unfinished Y = 4 = XTS AES-Twofish — unfinished Y = 5 = XTS AES-Twofish-Serpent — unfinished Y = 6 = XTS Serpent-AES — unfinished Y = 7 = XTS Serpent-Twofish-AES — unfinished Y = 8 = XTS Twofish-Serpent — unfinished 7600 = Redmine Project Management Web App
./cudaHashcat64.bin -m,2500 /media/INTENSO/@ReinbowTables-.rt/wpa/linksys.wpa /media/INTENSO/@ReinbowTables-.rt/wpa/WPA-PSK_WORDLIST-2_22GB/Custom-WPA