
15.11.2014
Due to its Rolling Release model which embrace cutting age software Arch Linux was not designed and developed to run as a server to provide reliable network services because it requires extra time for maintenance, constants upgrades and sensible file configurations.

But, still, because Arch Linux comes with a CD core installation with minimal software pre-installed, it can represent a solid base start up point to install most of the popular network services this days, this including LEMP or LAMP, Apache Web Server, Nginx, PHP, SQL databases, Samba, FTP servers, BIND and others, many of them being provided from Arch Linux official repositories and others from AUR.
This tutorial will guide through installing and configuring LEMP stack (Nginx, PHP , MySQL with MariaDB engine and PhpMyAdmin) from a remotely using SSH, which can provide a strong foundation to build Web Server Applications.
Requirements
Previous Arch Linux Installation guide, excepting last part on networking with DHCP.
Step 1: Assign Static IP on Network Interface
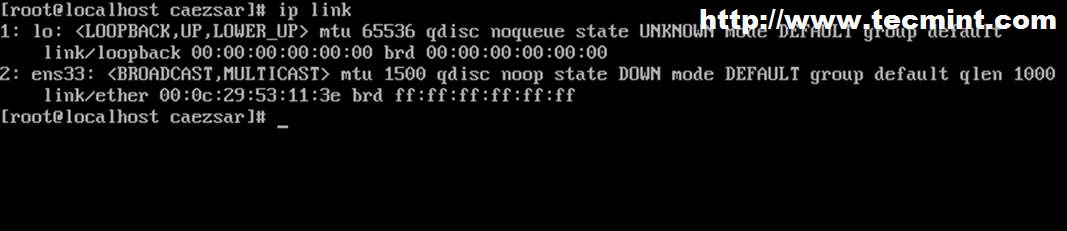
1. After minimal Arch Linux core installation reboot your server, login with root account or equivalent administrative sudo account, and identify your system NICs device names using ip link command.
# ip link
2. To assign static network configurations we are going to use Netctl package to manage network connections. After you have successfully identified your Network Interfaces names copy ethernet-static file template to netctl system path and change its name to a descriptive naming scheme ( try use “static” string combined with NIC’s name), by issuing the following command.
# cp /etc/netctl/examples/ethenet-static /etc/netctl/static.ens33
3. The next step is to edit this new template file by changing file’s directives and providing your actually network settings ( Interface, IP/Netmask, Gateway, Broadcast, DNS) like in the below excerpt.
# nano /etc/netctl/static.ens33
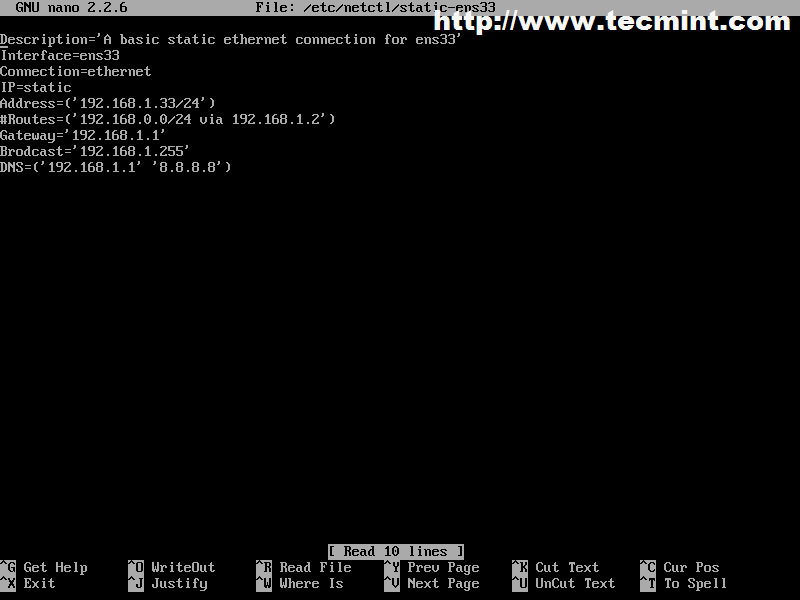
Description=‘A basic static ethernet connection for ens33’ Interface=ens33 Connection=ethernet IP=static Address=(‘192.168.1.33/24’) Gateway=‘192.168.1.1’ Brodcast=‘192.168.1.255’ DNS=(‘192.168.1.1’ ‘8.8.8.8’)
4. The next step is to start your network connection through netctl system tool and verify your system connectivity by issuing the following commands.
# netctl start static.ens33
netctl status static.ens33
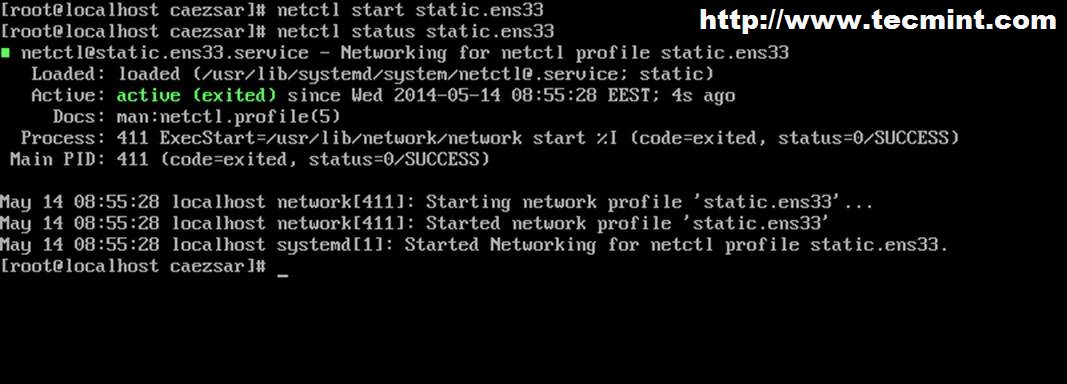
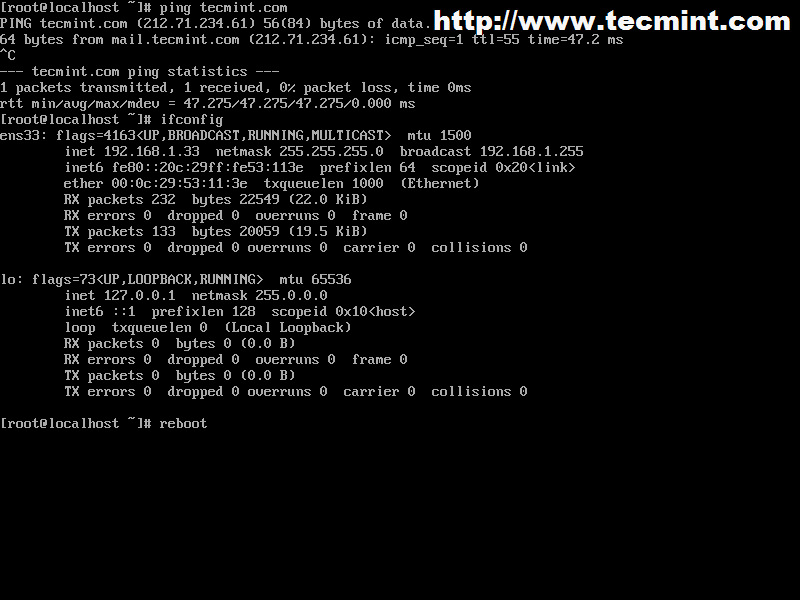
5. If you get an active green exit status you have successfully configured your Network Interface and it’s time to automatically enable it on system wide services. Also test your network by running a ping command against a domain name and also, install net-tools package (the most well-known feature of this package is ifconfig command which Arch developers considered to be kind of deprecated and replaced it with iproute2).
Enable system wide NIC’s configurations
# netctl enable static.ens33
Install net-tools package
# pacman -S net-tools
6. Now you can run ifconfig command to verify your Network Interfaces settings and check if everything is correctly displayed, then reboot your system to make sure everything is in place and properly configured.
# ping tecmint.com
Step 2: Install LEMP Software
As pointed in this article introduction LEMP stands for Linux+Nginx+PHP/PhpMyAdmin+MySQL/MariaDB which is one of the most widely spread web application platforms today after LAMP (the same stack with Apache in equation).
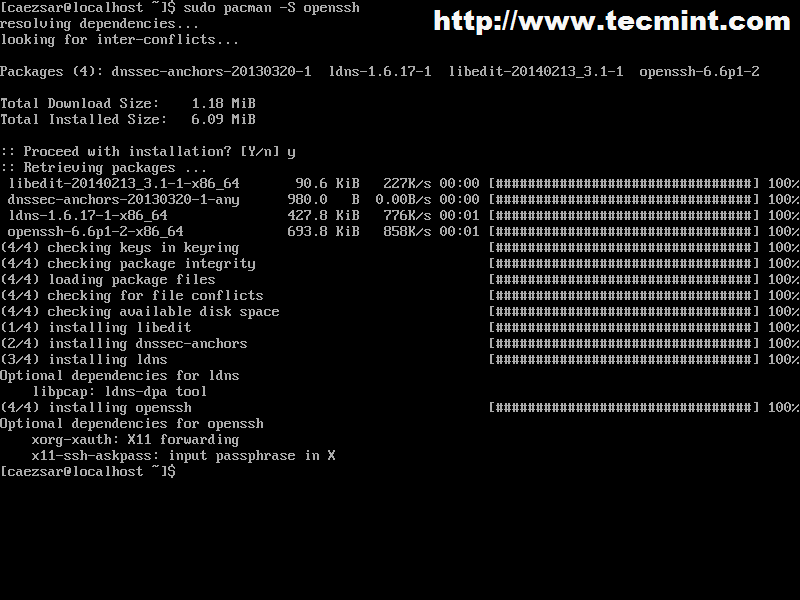
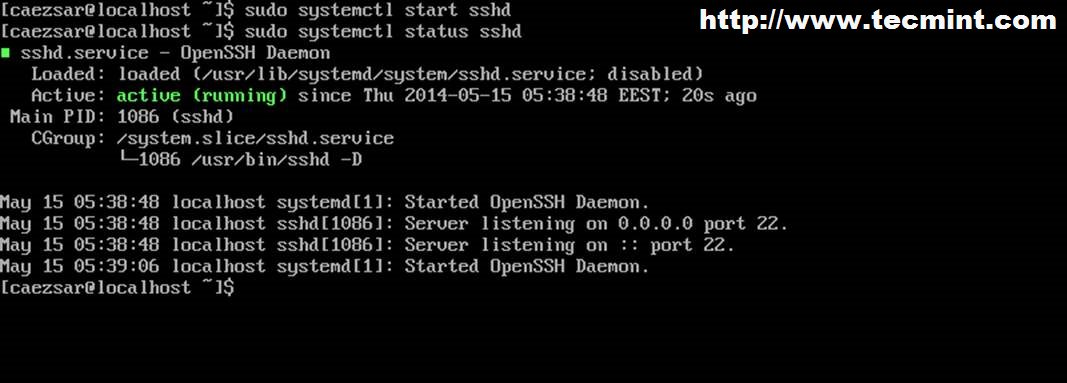
7. Before actually install LEMP stack we need to update system and then gain remote control to Arch Linux server. As you probably know OpenSSH is the main candidate for this job so go ahead and install it, start SSH daemon and enable it system wide.
$ sudo pacman -Syu $ sudo pacman –S openssh
$ sudo systemctl start sshd $ sudo systemctl status sshd $ sudo systemctl enable sshd
Now is time to proceed with LEMP installation. Because this tutorial is meant to be as a comprehensive guide I’ll will divide LEMP stack installation into small pieces, step by step.
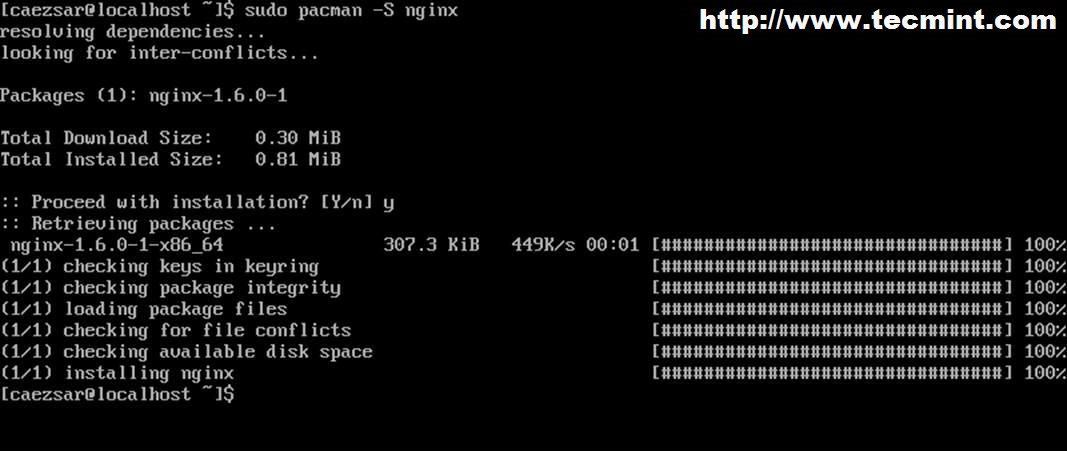
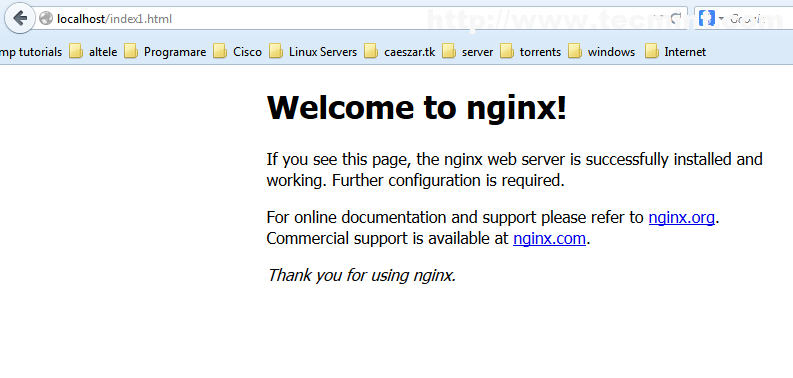
8. First install Nginx Web Server, then start it and verify its status by issuing the following commands.
$ sudo pacman -S nginx $ sudo systemctl start nginx $ sudo systemctl status nginx

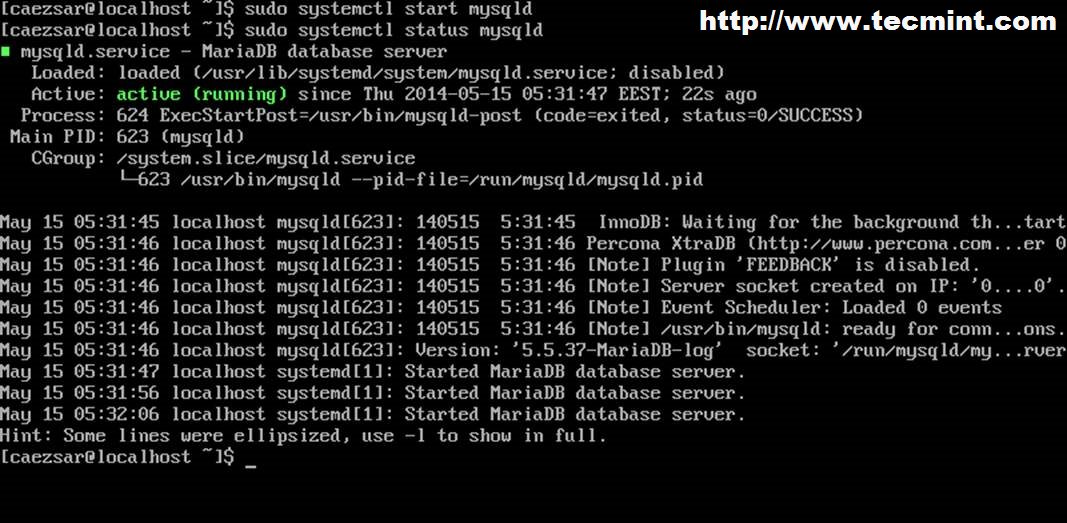
9. The next service to be installed is MySQL database. Issue the following command to install MySQL database server and choose MariaDB engine, then start and verify daemon status.
$ sudo pacman -S mysql $ sudo systemctl start mysqld $ sudo systemctl status mysqld

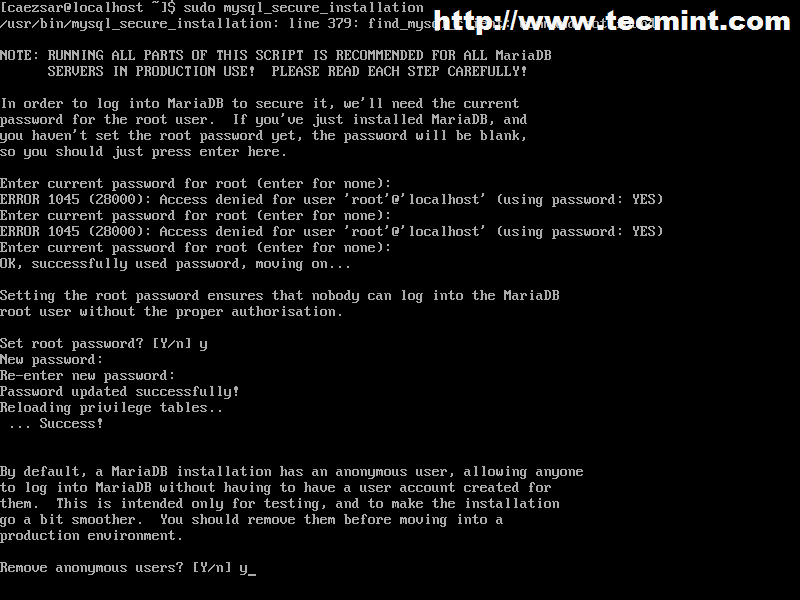
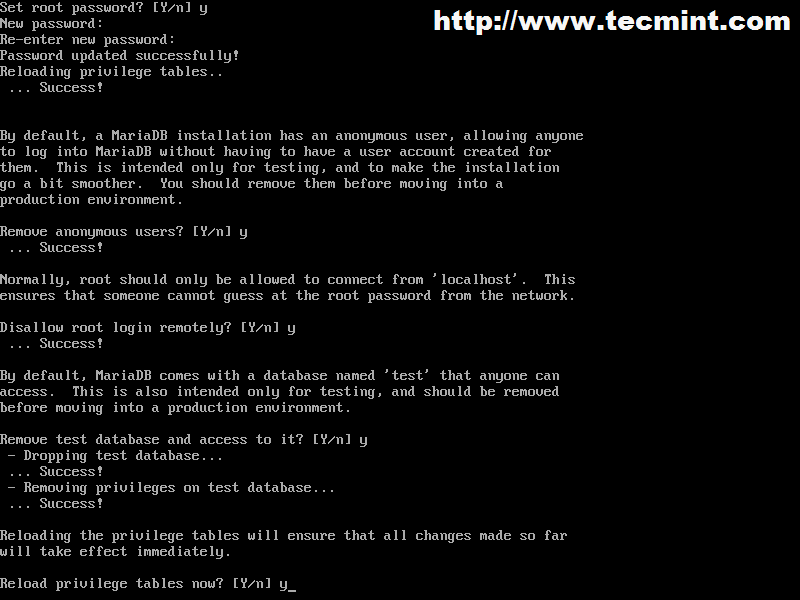
10. The next step is to provide a highly safe environment for MySQL databases by providing a password for MySQL root account, remove anonymous user account, remove test database and root accounts that are accessible from outside localhost. Run the following command to improve MySQL security, press [Enter] for current root account password, then answer Yes to all questions ( also setup your root account password).
$ sudo mysql_secure_installation
Note: By any means do not confuse MySQL root account with Linux system root account – they are two different things – not so different but they run on different levels.
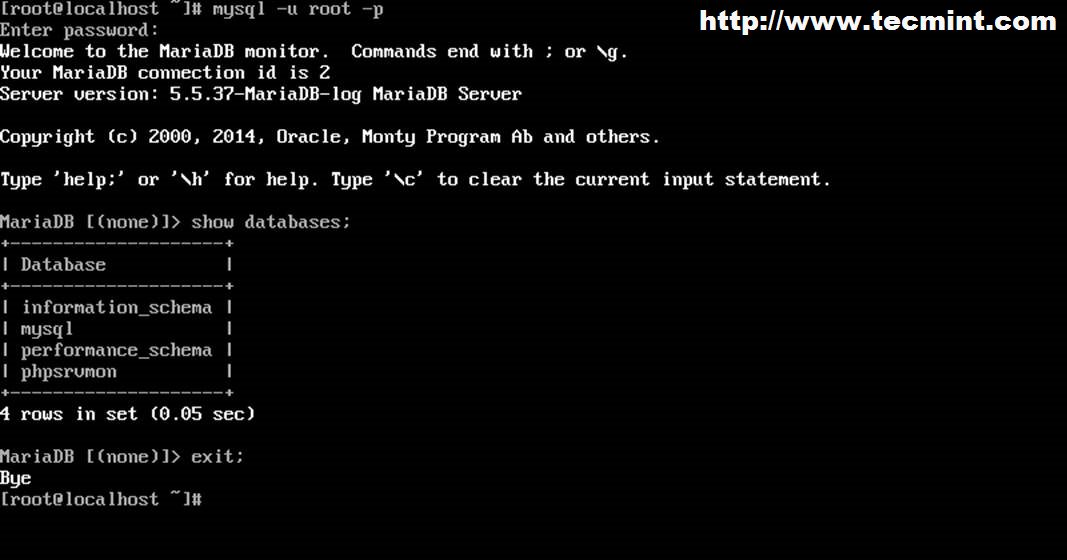
To verify MySQL security login to database using mysql -u root -p command syntax, provide your root password then leave database with exit; command.
# mysql -u root -p
11. Now it’s time to install PHP server-side scripting language to be able to develop and run complex dynamic web applications, not just serve HTML/CSS code.
Because we are using Nginx as a web server we need to install PHP-FPM backed module to communicate through Fast Common Gateway and change dynamic content generated by PHP scripts.
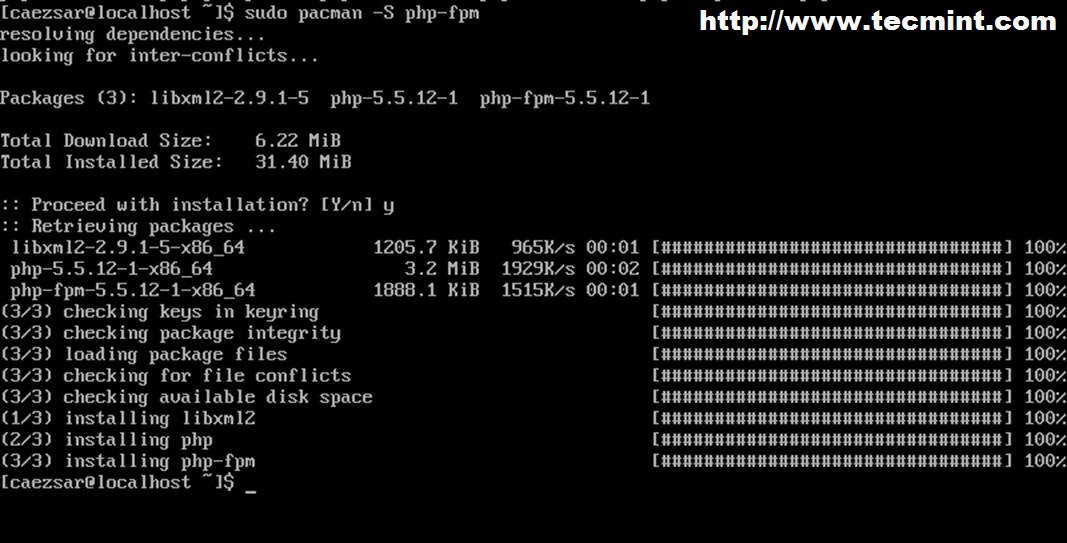
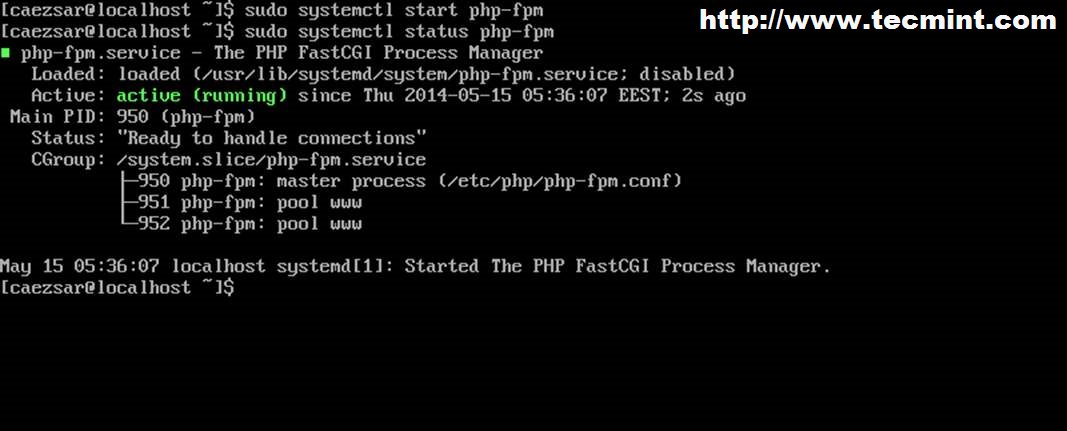
Issue the following command line to install PHP-FPM service, then start daemon and verify status.
$ sudo pacman –S php php-fpm $ sudo systemctl start php-fpm $ sudo systemctl status php-fpm
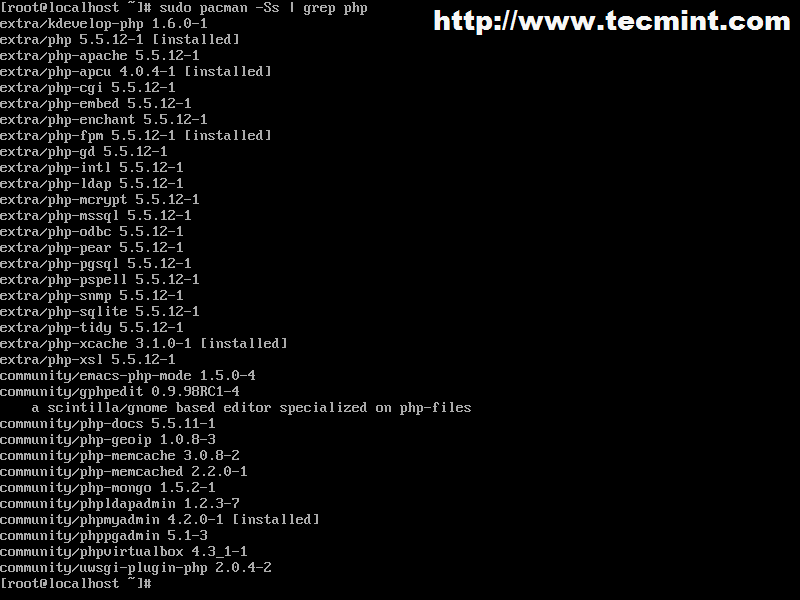
To list all available PHP module issue the following commands.
$ sudo pacman –S php[TAB] $ sudo pacman –Ss | grep php

12. One of the last steps is to install PhpMyAdmin Web Interface for MySQL database. Issue the following command to install PhpMyAdmin along with its PHP needed module then create a symbolic link for PhpMyaAdmin system path to Nginx default root path.
$ pacman -S phpmyadmin php-mcrypt $ sudo ln -s /usr/share/webapps/phpMyAdmin /usr/share/nginx/html

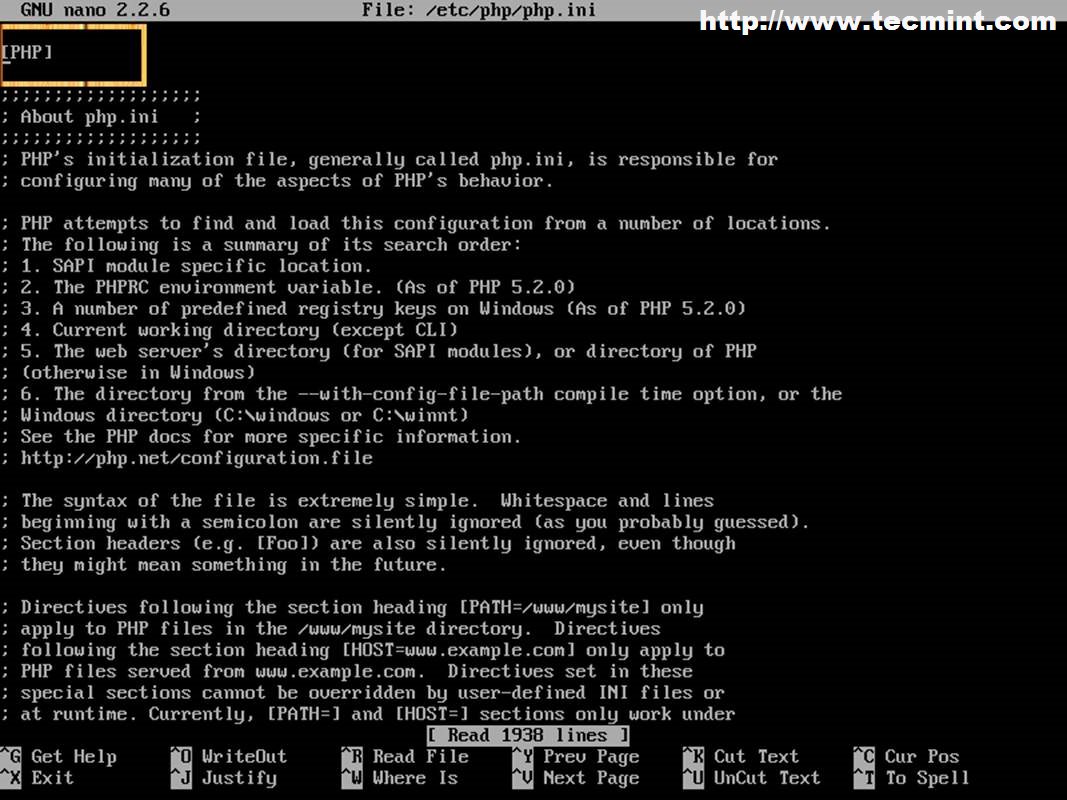
13. Then configure php.ini file to include necessary extensions needed by PhpMyAdmin application.
$ sudo nano /etc/php/php.ini
Locate with [CTRL+W] keys and uncomment (remove ; at the line beginning) the following lines.
extension=mysqli.so extension=mysql.so extension=mcrypt.so mysqli.allow_local_infile = On
On same file locate and edit open_basedir directive to resemble with the following included directories.
open_basedir= /srv/http/:/home/:/tmp/:/usr/share/pear/:/usr/share/webapps/:/etc/webapps/

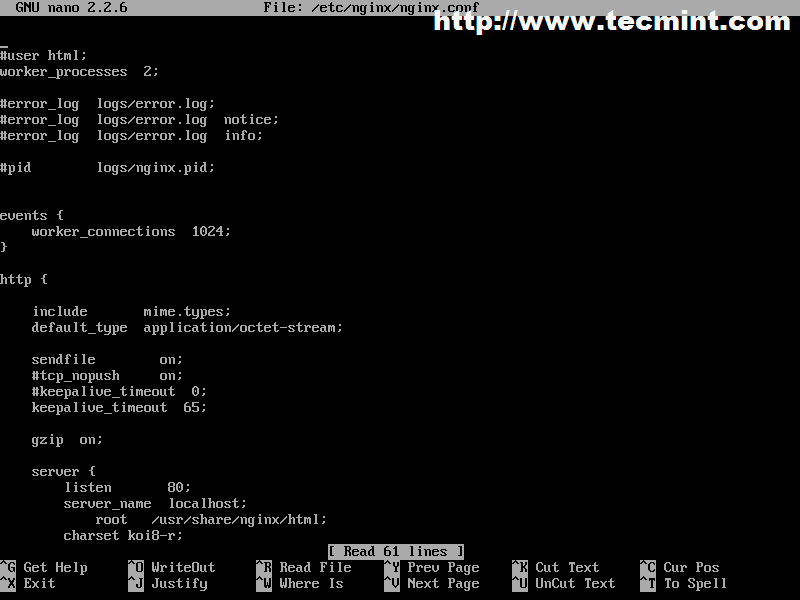
14. The next step is to enable PHP-FPM FastCGI on localhost Nginx directive. Issue the next command to backup nginx.conf web server file configuration then replace it with the following content.
$ sudo mv /etc/nginx/nginx.conf /etc/nginx/nginx.conf.bak $ sudo nano /etc/nginx/nginx.conf
Add the whole following content on nginx.conf.
#user html; worker_processes 2;
#error_log logs/error.log; #error_log logs/error.log notice; #error_log logs/error.log info;
#pid logs/nginx.pid;
events { worker_connections 1024; }
http { include mime.types; default_type application/octet-stream; sendfile on; #tcp_nopush on; #keepalive_timeout 0; keepalive_timeout 65; gzip on;
server {
    listen       80;
    server\_name  localhost;
        root   /usr/share/nginx/html;
    charset koi8-r;
    location / {
    index  index.php index.html index.htm;
                            autoindex on;
                            autoindex\_exact\_size off;
                            autoindex\_localtime on;
    }

                            location /phpmyadmin {
    rewrite ^/\* /phpMyAdmin last;
}
error_page 404 /404.html;
    # redirect server error pages to the static page /50x.html

    error\_page   500 502 503 504  /50x.html;
    location = /50x.html {
        root   /usr/share/nginx/html;
    }

location ~ .php$ {
    #fastcgi\_pass 127.0.0.1:9000; (depending on your php-fpm socket configuration)
    fastcgi\_pass unix:/run/php-fpm/php-fpm.sock;
    fastcgi\_index index.php;
    include fastcgi.conf;
}

    location ~ /.ht {
        deny  all;
    }
}
}
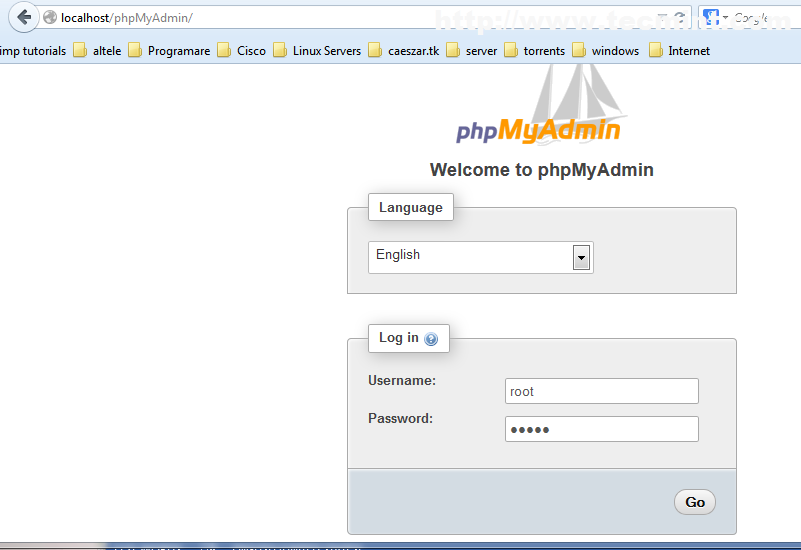
15. After all file configurations had been made, all you need to do is to restart Nginx and PHP-FPM services and point your browser to http://localhost/phpmyadmin URL from local node or http://arch_IP/phpmyadmin form another computer.
$ sudo systemctl restart php-fpm $ sudo systemctl restart nginx

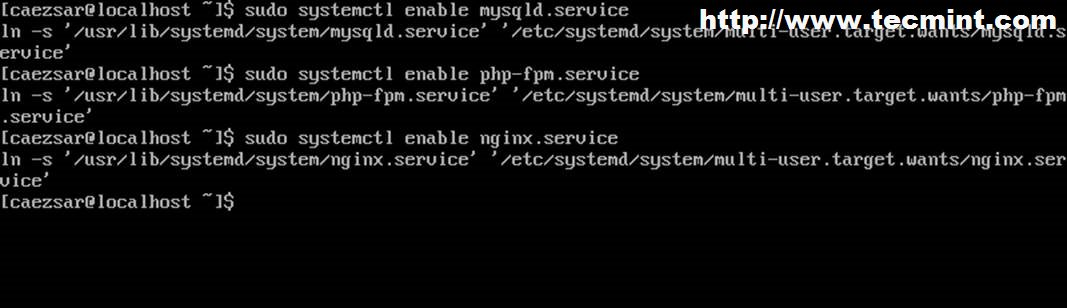
16. If everything runs as intended the final step is to enable LEMP system wide with the following commands.
$ sudo systemctl enable php-fpm $ sudo systemctl enable nginx $ sudo systemctl enable mysqld
Congratulations! You have installed and configured LEMP on Arch Linux and, now, you have a full dynamic interface to begin and develop web applications.
Although Arch Linux is not the most very-best suited system to run on production servers due to its community orientated rolling release model it can be a very fast and reliable source for small non-critical production environments.
Install and set-up LEMP (Linux Nginx MariaDB and PHP) stack in ArchLinux
3 months ago - by Daniel - howto lemp nginx mariadb mysql php php-fpm archlinux
I’ve been running Cubian (Debian Wheezy actually) on my cubbieboard2 for some time now and I must say it’s been rocking solid. However, last night I decided to settle ArchLinux ARM on the cubie, so I had to install and re-set everything I had on the Cubian, including Nginx, MySQL and PHP-FPM. So, this is all about that, what steps I used to install and set-up LEMP in my ArchLinux running on my Cubbieboard2.
I’ve split the article to the following sections:
- Update the system
- Install and configure MySQL
- Install and configure Nginx
- Install and configure PHP-FPM
1. Make sure the system is fully up to date
update the system using pacman
pacman -Syyu
2. Install and configure MariaDB database server
install MariaDB database server using pacman
pacman -S mariadb
configure MariaDB by editing its configuration file in /etc/mysql/my.cnf
if ! type -path "vim" > /dev/null 2>&1; then pacman -S vim; fi
cp /etc/mysql/my.cnf{,.orig}
vim /etc/mysql/my.cnf
add the following to the [mysqld] section
bind-address = 127.0.0.1
restart MariaDB and add it to system’s startup
systemctl restart mysqld
systemctl enable mysqld
post install script
mysql_secure_installation
- Enter current password for root (enter for none):
- Set root password? [Y/n] y
- Remove anonymous users? [Y/n] y
- Disallow root login remotely? [Y/n] y
- Remove test database and access to it? [Y/n] y
- Reload privilege tables now? [Y/n] y
set-up my.cnf client configuration for the root account
cat > ~/.my.cnf

[client]
user=root
password=<PASSWORD>
#socket=/var/lib/mysql/mysql.sock #centos
#socket=/var/run/mysqld/mysqld.sock #gentoo, debian
socket=/run/mysqld/mysqld.sock #archlinux
3. Install and configure Nginx HTTP server
install Nginx using pacman and configure Nginx main configuration file /etc/nginx/nginx.conf
pacman -S nginx
cp /etc/nginx/nginx.conf{,.orig}
cat > /etc/nginx/nginx.conf
user              http;
worker_processes  2;

error_log  /var/log/nginx/error.log;

events {
    worker_connections  1024;
    use epoll;
}

http {
    include       /etc/nginx/mime.types;
    default_type  application/octet-stream;

    log_format  main  '$remote_addr - $remote_user [$time_local] "$request" '
                      '$status $body_bytes_sent "$http_referer" '
                      '"$http_user_agent" "$http_x_forwarded_for"';

    access_log  /var/log/nginx/access.log  main;

    sendfile        on;

    keepalive_timeout  30;
    server_tokens off;

    connection_pool_size 256;
    client_header_buffer_size 1k;
    large_client_header_buffers 4 2k;
    request_pool_size 4k;

    output_buffers 1 32k;
    postpone_output 1460;

    gzip on;
    gzip_disable "MSIE [1-6].(?!.*SV1)";
    gzip_http_version 1.1;
    gzip_vary on;
    gzip_proxied any;
    gzip_comp_level 6;
    gzip_buffers 16 8k;
    gzip_types text/plain text/css application/json application/x-javascript text/xml application/xml application/xml+rss text/javascript application/javascript text/x-js;

    include /etc/nginx/sites-enabled/*;
}
the worker_processes option is determined by the number of CPU’s the machine has. In my case, the cubbieboard2 has 2 CPU cores as shown by lscpu
use Debian server block management style using sites-available and sites-enabled
mkdir -p /etc/nginx/sites-{available,enabled}
add Nginx server block that will serve a static website/content
cat > /etc/nginx/sites-available/files.stavrovski.net

server {
    listen 80;
    root /srv/http/files.stavrovski.net;
    server_name  files.stavrovski.net;
    access_log /var/log/nginx/files.stavrovski-access;
    #access_log off;
    error_log /var/log/nginx/files.stavrovski-error error;

    location / {
        root /srv/http/files.stavrovski.net;
        index  index.html index.htm;
    }

    ## caches
    include /etc/nginx/conf.d/caches.conf;
}
since I’m referencing to /etc/nginx/conf.d/caches.conf I need to create this file, so:
mkdir /etc/nginx/conf.d
cat > /etc/nginx/conf.d/caches.conf

## caches
location ~* .(jpg|jpeg|gif|css|png|js|ico|html)$ {
    access_log off;
    expires max;
}
location ~* .(js)$ {
    access_log      off;
    log_not_found   off;
    expires         7d;
}
location ~* .(woff|svg)$ {
    access_log      off;
    log_not_found   off;
    expires         30d;
}
location ~ /.ht {
    deny  all;
}
add a server block which will pass all PHP requests to PHP-FPM socket
cat > /etc/nginx/sites-available/stavrovski.net
server {
    listen 80;
    server_name stavrovski.net;
    rewrite ^(.*) http://d.stavrovski.net$1 permanent;
}

server {
    listen 443 default;
    server_name stavrovski.net;

    ssl    on;
    ssl_certificate        /etc/nginx/SSL/stavrovski.net.chained.crt;
    ssl_certificate_key    /etc/nginx/SSL/stavrovski.net.key;
    ssl_session_timeout  5m;
    ssl_protocols  SSLv2 SSLv3 TLSv1;
    ssl_ciphers  ALL:!ADH:!EXPORT56:RC4+RSA:+HIGH:+MEDIUM:+LOW:+SSLv2:+EXP;
    ssl_prefer_server_ciphers   on;

    access_log /var/log/nginx/stavrovski.ssl-access;
    #access_log off;
    error_log /var/log/nginx/stavrovski.ssl-error error;

    client_max_body_size 5m;
    client_body_timeout 60;

    root /srv/http/stavrovski.net/;
    index  index.html index.php;

    # root directory
    location / {
        try_files $uri $uri/ @rewrites;
    }

    location @rewrites {
        rewrite ^ /index.php last;
    }

    ## caches
    include /etc/nginx/conf.d/caches.conf;

    ## php block
    location ~ .php?$ {
        try_files $uri =404;
        include fastcgi_params;

        fastcgi_pass unix:/run/php-fpm/php-fpm.sock;
        #fastcgi_pass 127.0.0.1:9001;

        fastcgi_param SCRIPT_FILENAME $document_root$fastcgi_script_name;
        fastcgi_intercept_errors on;
        fastcgi_split_path_info ^(.+.php)(.*)$;
        fastcgi_hide_header X-Powered-By;
    }
}
enable the newly created Nginx server blocks using
cd /etc/nginx/sites-enabled
ln -s /etc/nginx/sites-available/files.stavrovski.net
ln -s /etc/nginx/sites-available/stavrovski.net
copy my SSL certificate and key to /etc/nginx/SSL and test, start and enable Nginx on the system
nginx -t
systemctl restart nginx
systemctl enable nginx
4. Install and configure PHP-FPM server
install PHP-FPM using pacman
pacman -S php-fpm
edit /etc/php/php.ini and change/uncomment the following
cgi.fix_pathinfo=0
date.timezone = Europe/Skopje
memory_limit = 64M
expose_php = Off
or do the following vim commands
vim /etc/php/php.ini

:%s#;cgi.fix_pathinfo=1#cgi.fix_pathinfo=0#
:%s#;date.timezone =#date.timezone = Europe/Skopje#
:%s#memory_limit = 128M#memory_limit = 64M#
:%s#expose_php = On#expose_php = Off#
next, set-up /etc/php/php-fpm.conf by adding the the following
mv /etc/php/php-fpm.conf{,.orig}

echo -e "include=/etc/php/fpm.d/*.confn" > /etc/php/php-fpm.conf
echo -e "[global]npid = /run/php-fpm/php-fpm.pid" >> /etc/php/php-fpm.conf
echo -e "emergency_restart_threshold = 10" >> /etc/php/php-fpm.conf
echo -e "emergency_restart_interval = 1m" >> /etc/php/php-fpm.conf
echo -e "process_control_timeout = 10n" >> /etc/php/php-fpm.conf
next, set-up a PHP-FPM pool in /etc/php/fpm.d/www-pool.conf
cat > /etc/php/fpm.d/www-pool.conf

[php-serve]
;listen = 127.0.0.1:9001
listen = /run/php-fpm/php-fpm.sock
user = http
group = http
listen.owner = http
listen.group = http
listen.mode = 0660
request_slowlog_timeout = 5s
slowlog = /var/log/php-fpm.log
listen.allowed_clients = 127.0.0.1
pm = dynamic
pm.max_children = 10
pm.start_servers = 3
pm.min_spare_servers = 2
pm.max_spare_servers = 4
pm.max_requests = 400
listen.backlog = -1
pm.status_path = /status
request_terminate_timeout = 120s
rlimit_files = 131072
rlimit_core = unlimited
catch_workers_output = yes
php_value[session.save_handler] = files
;php_value[session.save_path] = /var/lib/php/session
php_admin_value[error_log] = /var/log/php-fpm-error.log
php_admin_flag[log_errors] = on
restart PHP-FPM and add it on system’s start-up using
systemctl restart php-fpm
systemctl enable php-fpm
to enable MySQL/MariaDB support in PHP, uncomment the mysql extension in /etc/php/php.ini and reload php-fpm
vim +/mysql.so /etc/php/php.ini

extension=mysqli.so
extension=mysql.so
extension=pdo_mysql.so

systemctl restart php-fpm
php -m | grep mysql
to be able to deploy Laravel application you need the Mcrypt PHP extension
pacman -S php-mcrypt

vim +/mcrypt.so /etc/php/php.ini
systemctl restart php-fpm